Showing posts with label Flowers. Show all posts

Friday, October 31, 2014

Happy Halloween!

Happy Halloween!  Who's hit the candy bag before the kiddies even show up?  I hope you checked out fall table inspiration on Wednesday for our take on Fall Luxe.  Here's how I've put Fall Luxe into my apartment (which has limited storage space).  First up, here is my $15 Happiness pumpkin that I still love love love!

Please ignore the side of Xbox controller.

I set it on my coffee table and paired it with another mercury glass pumpkin from Sur la Table, which is on sale for $11.96!  My gold glass coasters are from World Market, but they sit out all year.


For my dining table, I kept my Target tablecloth because it didn't seem to clash with all the other decorations.  I used another mercury pumpkin from Sur la Table (purchased last year), two brass pumpkin tiny taper holders from Williams-Sonoma (bought on super clearance for $2.95 each this past summer).  I also mixed in a real pumpkins from the grocery store and put these beautiful peachy roses in a vase I already owned (the flowers were a Halloween present from Mr. 3...sweet man).


We also are lucky enough to have big beautiful windows in our dining room, so I set up a little festive display using a mix of succulents which I already owned and more tiny taper holders, grocery store pumpkins, and another mercury glass pumpkin from Sur la Table.


I also love to light a candle this time of year, but I can't stand the fragrance of most candles - they always smell too chemically or sweet.  The higher end candles (i.e. Jo Malone and  Diptyque) are wonderful, but I have a policy against shelling out $50+ for something I'm going to light on fire.

This soy candle is Green Tea and Ginger which means I get a bit of yummy fallness from the ginger without going overboard.  I find this brand at Home Goods, TJ Maxx, and Marshall's for $6.99-$7.99 aaaaaall the time and it's pretty much the only candle I will buy these days.  All of their fragrances are light and wonderful.


Like my inspiration board, I'm mixing different textures with metallic and natural finishes for a Fall Luxe look, but I'm also being budget and space conscious.  I decorated in mid-September so I feel like I'm getting a lot of use out of my fall decorations.  Because I didn't carve the pumpkins, I should be able to use them all the way to Thanksgiving.  Also, by mixing in grocery store items like the peach roses and grocery store pumpkins, I'm not having to store a large supply of decorations in a small apartment space when it's time to start decorating for Christmas.

Aaaand just to keep it real with y'all...here is my mum that a guest at my ice cream social gave to me.  I'm not sure what happened, but I should probably go as a planter murderer for Halloween.


Mr. 3 and I are planning to have a festive fall meal tomorrow for Halloween and hand out candy to the children in our apartment complex.  What plans do y'all have in the works for Halloween?  Whatever you do, stay warm and safe!

Wednesday, September 24, 2014

Posh Purpose: Styling a Baby Bouquet

My friend Tara delivered the sweetest little baby boy a few weeks ago.  Mr. 3 is craaaazy for babies and we immediately went over to visit the newborn at only three days old.  I wanted to bring my good friend a flower arrangement and I decided to try my hand at styling a bouquet for a baby.

I bought all of my flowers from Safeway and used a clear vase I already owned. 

Supplies
Bouquet vase
4 types of flowers - one large fluffy bloom, a medium fluffy bloom, and two smaller blooms
1 small baby balloon from the floral department
Ribbon

I picked up a pack of large hydrangeas with three stems, medium sized green hydrangeas with 5 stems, and two packs of mini carnations. I decided to do the main blooms in more "boy" colors with green and blue, but since I was sending these to a new mama, I added in some pink accents.  I put my arrangement together on Friday when I heard that the baby had been born in order to give the flowers time to open up before we visited on Sunday.


I started by trimming all the stems at an angle and prepping the vase with room temp water and plant food.  I put the largest blooms and the medium blooms with all of the leaves that were above the water line still intact (leaves below the water line = yucky, murky water).  


I moved the blooms around until they were evenly spaced and then began filling in with clusters of mini-carnations.


Once I had everything packed in, I added in my baby balloon.  I also eyeballed the arrangement and removed the hydrangea leaves that I thought looked a little wonky.  I liked the color and extra fullness that they added to the arrangement, but I didn't want my arrangement to look like a crazy overgrown wildabeast, so I removed the ones that looked "off."


Finally, I found some scrap white ribbon and tied a bow around the neck of the vase for a bit of extra festive fun (also, it's a gift...don't all gifts need bows?).


 Because I had the scrap ribbon and vase, this flower arrangement only cost about $23 (I had an e-coupon through Safeway for the carnations!).  If you had to add those costs in, you would probably be looking at about $35 if you had to buy the vase at the grocery store (but check Dollar Tree and the thrift stores...you can always find cheap vases!).  I also had enough leftover carnations to make two small arrangements for myself!  I tend to spend more money on flowers that take up a lot of room, but may only come with a few stems (like hydrangeas, lilies, peonies) and then using cheaper blooms that usually come in large quantities for fill in (like carnations and mums).

This is a great project to try your first attempt at flower arranging because you can make it really low cost and you don't need anything special like floral foam.  If you live close enough to take visit your friend or family member, making your own bouquet is also waaaaaaay cheaper and more personal than ordering flowers online.  You could easily use these same Posh Purpose styling tips to make bouquets for birthdays and other celebrations, or to cheer someone up as a get well present  (Safeway had several choices for balloons for every occasion).  Anyone else made any pretty bouquets lately?  We would love to see them, so feel free to email them to us at poshpurpose@gmail.com!

Friday, August 29, 2014

Styling a Manly Flower Arrangement

Women are usually the only people who care about having flowers at a party.  I bet there are also a zillion men out there who can't understand the importance of having flowers, even at a wedding (um, hello. decor for the photos and a table arrangement will give your guests something to look at rather than awkwardly staring across the table at another guest they probably don't know).  When I threw Mr. 3 a bourbon party for his birthday back in January, he specifically requested no decorations...HOWEVER, I'm pretty sure that's because I hadn't thought up the idea of having a liquor bottle arrangement!  Now, I think we are all well aware of how nice flowers can look in wine bottles, but I don't think that I've seen much in the realm of liquor bottles.
Please excuse the banged up table...I had yet to finish ironing my tablecloth that day.

Let me tell you, this is probably the easiest and cheapest flower arrangement you will ever make (minus the cost of the liquor of course).  I waited until we three empty booze bottles, which mind you, I have been collecting for the past 6 months...NOT the past 6 days.


The openings for the bottles are quite narrow, so I knew I wouldn't need very many flowers and they had to have small stems and bigger blooms in order to work.


So, I picked up a bouquet of pom poms for $4.99 at Safeway.  I decided to stick with white so the flowers didn't clash with the labels aaaand because pink and purple didn't seem so mantastic to me. 


Because the bottle necks are so slim, it's best to cut your stems really short.  I cut the thick part of the stem off of all the pom poms to start out, but because pom poms grow as groups of blooms (meaning several buds connected to individual thin stems, but are bunched together and connected to one larger stem) you will need to further cut them down and separate them out for this arrangement.  After separating each bloom, I trimmed the stems down to about 3 inches and removed any leafy bits still hanging around (if you don't take care of them and they get into the water, things get murky fast!).


After thoroughly washing out the bottles for any lingering liquor, I filled my bottles with room temp water, leaving only the neck of the bottle free.  It's best to use room temp water for flowers because cold water can shock the blooms.  I grabbed a couple of big blooms and put them in the bottle first, then worked in some smaller blooms, and finally put the buds in last.  By working in this order, the bigger blooms supported the buds and kept them from falling into the bottle.  I kept working the blooms in until I couldn't get any more into the neck to make the arrangement super fluffy.


I repeated with the other two bottles until I had this fun, fluffy display!


The best part about this arrangement is that it was sooooo cheap.  I made three bottle arrangements using $4.99 bouquet and had enough left over to put in a vase with three sunflowers.  I think you could easily get 6-8 bottle arrangements out of a decent sized bouquet.  This arrangement was also super easy to make!  I think it took me about 30 mins and that included washing out the bottles and stopping to take pictures.

I don't think I would suggest this for a wedding centerpiece, but it would be a really cute way to display the types of liquor being served at your wedding or celebration wherever you have your bar station set up.  I could also see setting up a display for the ingredients in a signature cocktail.  For example, if you were serving a Jack Daniels Honey Lemonade (which is just Jack Daniels Tennessee Honey, lemonade, and a cherry garnish), you could create a flower arrangement in the bottle and display a bowl of lemons next to a sign for your cocktail.  This is definitely man friendly too and could easily be used at any man's birthday party or BBQ.  Mr. 3 came home after I had finished making the arrangements and he thought they were "pretty great" (love that man!).

Anyone else ever recycled their booze bottles into a vase?  If so, we'd love to see pictures!


***This is not a sponsored post.  We were not compensating in anyway, including free booze or flowers, to write this article.  We just like sharing easy and inexpensive ideas with our Posh Purpose Readers!***


Tuesday, May 27, 2014

Posh Purpose: Styling Your Patio Garden

I hope everyone had a great Memorial Day with friends and family!  Mr. 3 and I had the most relaxing and productive weekend that we have had in quite some time.  We mixed in a little bit of housework (cleaning off our patio, hanging artwork in the living room and guest bedroom, and lots of laundry) with a bunch of fun (going to the movies, taking a bicycle ride (which is more terrifying than fun for me), grabbing ice cream in Old Town Alexandria, and antiquing for me).  One of our weekend treats was going to Home Depot to pick out plants for our patio garden.  I had originally thought that I would pick up a few terracotta pots and paint them to match my green, pink, gold, and black color scheme going on out on the patio...buuuuuut then I found these cute ceramic pots at Michael's which saved me the trouble of getting them painted:


The pink pots were originally $4.99 and the white pot was $9.99, but Michael's was running a 50% off sale and I had a 10% off total purchase coupon.  Which brought the pink pots to $2.25 and the white pot to $4.50.  The pink pots had a hole for drainage and the saucers were attached to the pots.  The white pot also had a hole for drainage, but didn't come with a saucer (I had an extra one already).  Overall, I thought these were a great deal!

I decided to plant banana peppers, jalapenos, basil, and mint with the hopes of spicy salsa, caprese salad, and mojitos for the summer!  Planting the peppers and herbs was super easy.  I chose to buy the seedlings rather than the seed packets since I figured there was less chance for planting error, overwatering, and neglect if I picked out something that had already gotten a good start.  I also didn't feel like waiting 4-6 weeks for my crops to come in.  The plants cost between $3.33-$3.68 each and I picked up a really small bag of organic potting for about $5. Since my garden is very, very small, I just used a solo cup to scoop out the dirt rather than buying trowels or gloves.


Aren't they cheerful?  I love the bright pop of color that they bring to the patio and I'm going to save a good bit of money on pricey basil and mint even if I only get a few "harvests" out of them.  Pre-packaged basil and mint usually cost between $3-4 at the grocery store.  Even if I only get to use them twice this summer I will pretty much break even on the cost of the plant and pot.


Here's a few tips for styling your patio garden:

1. Check out craft stores for prettier and cheaper pots than you can find at Home Depot.  There were no pink pots to be had at Home Depot and the cheapest fancy ceramic pot I saw was $7.

2. Take your color scheme into consideration.  I love that the bits of green plants play off the pink and white outdoor rug and my outdoor entertaining servingware.  Try to find pots that bring a pop of color to your patio...it may help remind you to water them and also use the plants you've so carefully planted.

3. Buy plants that you think will last on your patio.  I have indirect sunlight pretty much all day long with a few hours of direct sun as well, which will be great for all my plants.  I decided not to buy bell pepper or squash because we have a big tree that a squirrel could very easily crawl up and jump onto our patio to grab a tasty snack.  I think it will stay away from my hot peppers...at least after the first time.

4. Go with multiple small sized pots if you don't have much space or if your available space is awkward.  If you have enough space and don't want so many containers, buy one or two large sized pots and plant multiple items in them like herbs in one and peppers in another.

Anyone else tried to make an apartment garden?  Send us pictures!

Wednesday, April 30, 2014

Posh Purpose: Styling a Bud Vase

In yesterday's post on How to Host: Holiday Potluck, I told y'all I made five small flower arrangements using two thrift store bud vases, two promotional glasses that came with some lemoncello I purchased at Christmas, and an old candle jar.  Here's a tutorial on how I made my bud vase arrangements:

Supplies
- 4 bud vases and one smaller, short container for flowers that don't have very long stems or ones that are broken off.  An old jelly jar or candle jar would be perfect, just scrub off any non-attractive labeling (i.e. nutritional information).
- Scissors for cutting and trimming flowers (I just used some regular office scissors)
- 3 types of flowers - all small to medium sized blooms (one fluffy medium sized, one fluffy small sized, and one non-fluffy bloom)

For the flowers, I went over to Safeway and picked up one bunch of lavender pom poms (fluffy medium sized), pink and white mini-carnations (fluffy small sized), and yellow tulips (non-fluffy bloom).  The pom poms were the base for the flowers and the carnations and tulips were used as accents and fillers.  Although I love big flowers, you are going to have more trouble arranging large bloom flowers in a bud vase because (1) if it's a hydrangea for instance, it's going to take up the entire vase and (2) the weight of the flower might cause the vase to actually tip over.  

You can pick flowers that work with your color scheme in your dining or living room, the theme (i.e. pastels for spring), have lots of contrast (like my arrangements), and you can never go wrong with all white.  Also, look for flowers that will give you the most bang for your buck.  I believe the huge bunch of pom poms was $4.99.  Although I could have bought a ton of mini carnations at about $2 each, they don't have as much volume as the pom poms.  The tulips were the most expensive at 10 stems for $5.99, but they are my favorite flower and I love the contrast with the other two colors. 

Since our event wasn't until Sunday, I bought my flowers on a Friday and made sure to look for carnations and tulips that were still mostly closed.  I wanted to arrange them ahead of time because I found out that Safeway's last shipment of flowers for the week comes on Fridays and since it was Easter, I worried about them selling out of the best looking flowers if I waited until Saturday night.  Ask your florist when their shipments come in so you can always get the best selection, but try not to buy them more than 48 hours in advance of the event.  Also, make sure to arrange them immediately so that the flowers have time to open up and don't get dehydrated.

Beautiful blooms and my two lemoncello glasses to the right

I followed similar steps that I described in my post on styling low flower arrangements.  Start by putting some powdered plant food in each container (flowers usually have a packet attached to each bunch, but you can also ask the floral department for a packet or two if you don't see any attached), but hold off adding water until the end.  Water is much easier to put in than trying to sprinkle the food packet into a vase once the flowers are in it.

I cut the flowers down to fit the depth of the vases and stripped them of all their leaves (leaves below the water line make for short lived flowers and really yucky cloudy water).  For bud vases, it's nice for the flowers to have different heights, so don't cut everything the same length.  Start with your fluffiest flowers first, in my case - pom poms, and divvy them among your four bud vases so that they all appear to have the same amount of flowers.  Obviously some flowers will have bigger blooms, so just counting them out evenly won't work in this situation.  Next, layer in your smaller fluffy flower, I used mini carnations, to start filling in gaps.  Finally, use your non-fluffy flower to add pops of color or extra interest to your arrangement and fill in any final gaps, I used tulips.  Arrange the flowers so the center of the arrangement is the tallest point and it gradually gets shorter on the sides.  For example, you wouldn't want a really tall flower positioned on the wall of the bud vase because the arrangement will look lopsided.  Save tall blooms for the center.  You will probably wind up with flowers too short to fit in your bud vases, so arrange them in your small jelly jar or candle container for a really low arrangement.  This is a really easy way to get one more arrangement and since it is so small, it doesn't take any real skill to arrange it.  For our holiday potluck, I put mine in the bathroom.


Not only do I arrange flowers, I also fold laundry...and then leave it in the background of my styling posts as evidence.

Candle jar flower arrangement using leftover blooms

Bud vases are super easy to arrange, but there are a few things to keep in mind.  For the most part, bud vases look really bad with only a few scrawny flowers in them, so they still need lots of flowers to fill them in.  Second, make sure you have very little stem showing at the top of your bud vase.  It will look more like a professionally done flower arrangement when you place blooms to strategically cover up the stems at both the top of the bud vase and throughout the arrangement to cover up the taller stems in the center.  Also, don't make them too tall, you'll risk toppling them over and if you use them as a table centerpiece it may be hard to see around once everyone is seated.

View from the top...looks like loads of flowers!

After I finished arranging the flowers, I went back and added lukewarm water to the vases (just take your index finger and hold the stems to one side while the faucet is running.  You'll get water all over the vase, but it's much easier to dry it off than to try to find a spot to pour water into each vase.).  You don't want to shock the flowers with cold water, it would be like throwing yourself under a cold shower.   Post-party, keep an eye on your water levels to lengthen the life of your arrangements.  I refilled my vases twice over the past 11 days that I've had them and they are still going strong!


Bud vases are an extremely affordable way to put flowers on your table that still have a big impact.  I only spent $13.74 on these arrangements and I put them all over the apartment to really brighten up the space for our potluck.  I really think it's these small touches that really elevate your party...even if it is a potluck in a young married couples apartment.  It shows that you put time and thought into making a beautiful event for you and your guests to enjoy.  Creating your own arrangements using the containers you already have and using grocery store flowers makes this a super affordable upgrade for any party.  Anyone else tried a bud vase arrangement?  Let us in on any secret tips you have!

Monday, April 7, 2014

Posh Purpose: Styling a Low Flower Arrangement

I hope y'all got a chance to check out our How to Host: Tea Party post last week.  I had a lot of fun hosting and planning for the party.  One of the "must do's" I mentioned in the article was putting out pretty fresh flowers.  As promised, here is a tutorial on how I pulled my arrangements together.

Supplies
Low, wide bowl
Tape
Scissors for cutting tape and trimming flowers
3 types of flowers - one with large blooms, one with small blooms, and one filler

You should make your arrangements the day before your event and then keep them cool (they don't need to go in the fridge, but don't set them near a heating vent or sunny window either), this will allow your flowers to open up the day of your event.  If you make the arrangement too far in advance, the flowers may start to die or wilt and if you wait to make it the day of, your flowers won't be fully blooming.  If you make your arrangement the night before, this will give the flowers time to open up and your arrangement will look super fluffy like the flowers you see in wedding magazines.  

I started out with a wide, low bowl.  Mine is from Tiffany and measures about 9.5 inches in diameter.


I then marked off the bowl with some painter's tape (shhhhh...don't tell Mr. 3, he hoards his paint tape) because I didn't like the idea of picking bits of scotch tape off the side of the bowl.  If I had to do it over again, I would probably use the scotch tape, but I would buy the cheaper frosted kind because I figure it will hold  up better than the painter's tape, but will be less likely to stick to my crystal.  I should also mention that I cut the painters tape strips in half to make them narrower.  The idea behind the tape is to prop up the flowers so you can shape your arrangement without having the stems flop all over the place.


After a quick trip to Safeway, I bought one bunch of hydrangeas (three stems - big blooms), one bunch of peach carnations (12 stems - small blooms), and one bunch of snap dragons (three stems - filler).  After you've trimmed all the stems down to fit the depth of the bowl, strip all the leaves from all the stems because if they get into the water, your arrangement gets yucky quick.  Then begin arranging by starting with your biggest blooms first.  This will help you better place your small blooms and filler.


After I had those arranged, I added in the small blooms peach carnations at various places around the bowl.  I didn't want them spread out individually all over, but I tried to group them in clusters.


Finally, I put the white snapdragons in the arrangement to fill in some of the holes and add interest to the arrangement.

Which was all fine and dandy until I realized that I hadn't purchased enough flowers and there was one hole in the arrangement.  So, I went back to the store and bought another batch of the same mix of flowers flowers.  I was just going to buy another hydrangea bunch, but then I realized I would have two extra stems just hanging out and I had one other smaller bowl that I could put flowers in for the coffee table.  After I filled in the hole with another hydrangea and a few more carnations, I poured lukewarm water into the bowl with a teapot so the petals didn't get wet or fall in the bowl (Despite what most people think, I read somewhere that lukewarm water is better for flowers.  Evidently, putting cold water on them is like pushing someone into a cold shower and it can shock them a bit.).  After I watered the arrangement, I noticed that the painter's tape had started to sag and it was hanging in the water in a few places, so I carefully snuck my hand around to pull all the tape off without disturbing the flowers.  If I had used scotch tape, I probably could have left it on the bowl and it probably wouldn't have drooped as much.

For the second arrangement (see the one on the right), I  had to use the leaves from the hydrangeas to add more filler because the second batch of carnations were much smaller and also hadn't opened up much.  Since this was a much smaller bowl, I was able to forgo taping off the grid.


I spent about $35 on making the two arrangements, but there were a lot of fun and really easy to make.  Each of the type of flowers I bought were close to the same price.  I went with hydrangeas since they gave the most bang for the buck (hydrangeas take up a lot of room in a vase or bowl!).  Carnations often get a bad rap...and they do look a little sad if you just have a few by themselves...but big bunches of carnations grouped together and packed in are a beautiful, fluffy, and cost effective alternative to roses or peonies.  Finally, the filler flower - snapdragons - were so pretty and the easiest to arrange.

I've had to remove some of the stems that died, but they are still going strong over a week later!  The flowers really made the party and I received many compliments, plus I got to enjoy them all week long.  I found it very relaxing to make the flowers and I love the results!  I wish I were one of those women who treats themselves to fresh flowers once a week, but that's a bit out of my budget.  However, we have a Easter potluck coming up and I think I will make another arrangement for that lunch.  I'm thinking I might try several small arrangements next time around.  Even though I can't have them every week, I can look forward to the times I can have fresh flowers for a special occasion.  Anyone else have any luck making flower arrangements?  Consider making your own for your next party, shower, or lunch!

Friday, April 4, 2014

How to Host: A Tea Party!

Briana and I dearly love a good tea party, so much so, that we went to high tea at the Ritz Carlton in Buckhead as a part of Briana's bachelorette weekend.  I also went to a Christmas tea this past year and we had a great time (well, I did...I don't think menfolk appreciate teeny sandwiches like I do).  So, I decided to host my own tea party for some of my favorite girls in DC.  I didn't want it to be a super stuffy party, but I wanted it to look pretty and have lots of yummy food.  I had the tea party last weekend and we had the.best.time.

The Decor

I didn't want to do a typically pretty pretty pink princess party, so I decided to use my blue table throw and peach napkins from Habitat accented with metallics mixed in.  I only invited a small number of ladies so it was really easy to use china rather than paper plates at this party.  I used my everyday china (Kate Spade Larabee Road...yes, I know it's actually a fine china, but I say who cares?  I mix it in with Williams-Sonoma's Pillyvut Eclectique which is everyday china.)  I used the salad plates and the cup and saucers for each place setting. To serve lemonade, I also busted out my blue crystal glasses from Villeroy and Boch which were a wedding present I hadn't gotten to use yet!  I added a cute gold chevron paper straw to each glass which I found at Home Goods a couple of months ago.  For place settings, I used leftover paper doilies from my wedding which I bought at Michael's.  I used my everyday silverware that my mama bought for me when I moved into my first apartment by myself.

Tea for 5!

Don't you love a paper straw?
For decorations, I made two flower arrangements using grocery store flowers from Safeway (tutorial will be coming to Posh Purpose soon!) and two crystal bowls that I had gotten from Tiffany and Kate Spade (also as wedding gifts).


Ignore the wrinkles in the table throw...I took an iron to them later.

Finally, for favors I made personalized tea bag rests for each girl and laid them on their plates as the name cards (another tutorial to follow soon!).  I also bought paper boxes (purchased using a 40% off coupon) and put a pre-made stick on bow (3 for $1) from Michael's so that the girls could take home leftovers.  I also bought a split of prosecco for each girl (I picked the brand out based on the $2.99 price tag and the blue colored bottle) and made it festive by adding some silver curling ribbon I already owned.

Although I spent a bit of money on the flowers and favors, everything else I already owned.

Love this look!

To go boxes and prosecco favors

The Food
If you follow me on instagram (and you should!), you know that I made mini-pineapple upside down cakes with pink (that's right...pink!) maraschino cherries. I also made earl grey tea cookies and chocolate mousse which I spooned into pre-made chocolate tuxedo shells and topped with a raspberries.  No tea party could be complete without a macaroon, so I found some frozen ones at World Market that I got basically for free after using a $5 off of $15 coupon since I was already buying other non-party items.  Since I value my sanity and didn't want to drive myself nutso making tons of tea cookies, I asked each girl to bring a cookie to share.  I made all the baked goods on Friday and just filled the tuxedo cups on Saturday.  The macaroons just had to be dethawed.

I also served four kinds of tea sandwiches on Saturday morning - goat cheese and fig jam, pimento cheese, chicken salad, and what I am calling Elvis fluffernutters.  I bought the pimento cheese and chicken salad from Whole Foods.  The goat cheese and fig jam might seem fancy pants, but it's the equivalent of putting a PB&J together.  The Elvis fluffernutters were a variation on a recipe I had seen on How Sweet It Is (by far my fav food blog!) and consisted of peanut butter, bacon, and fluff (I chopped up the cooked bacon and mixed it in with the peanut butter).  The fluffernutters were by far the favorite sandwich!


For drinks, I served Simply Lemonade and Gloria Ferrer champagne (by far my favorite California "champagne").  For the tea, I used a strawberry lemonade herbal tea and a pineapple blooming tea, both from Teavana, that Mr. 3 had given to me as a present.  I bought brown sugar cubes for both champagne cocktails and for the tea.


The Set Up
Because I had a limited number of guests, I was able to have everyone seated around the dining table.  I repurposed my tea cart, which I've been using as a makeup vanity to set up the most of the food.  By using tiered stands, I was able to put out all my desserts while still having room for the sandwiches platter and a pitcher of lemonade.  I made a separate station using a nesting table with the tea, sugar, and lemon (seen above).  I also placed a tea strainer (purchased from World Market) on the nesting tables to make sure the loose tea leaves didn't fall in with the teacup.  I had the girls put their treats on the kitchen counter and I made everything self service.  While some people might not agree with making the food and drink self service, it freed up my time to chit chat and kept me from feeling awkward...I didn't want to feel like I was playing "lady of the manor" with my friends, plus I'm not the best tea pourer, so I didn't want all eyes on me.

I stored the to go boxes and prosecco favors on the bottom level of the tea cart so that I wouldn't forget to hand them out.

This set up probably wouldn't have been comfortable with more than 5 people, but it worked really well for our small group.

Tips & Tricks to Take Away

1. Ask your friends to bring a tea cookie or sandwich to share.  Most girls like an excuse to bake, so unless you're hosting this tea party as a shower or birthday celebration, it's ok to ask them to bring something.

2. Making that many sandwiches took me about two and a half hours to make, but I made waaaaay too many.  I could have made about 40% less and still been fine.  I would only make one sandwich of each variety per person (I think I made 6-10 of each kind....thinking that people would like more of some than others).  Also, if you have a good resource like Whole Foods or Harris Teeter for pre-made fillings like the chicken salad and pimento cheese...just buy them.  I don't know how you could make them for less money or in the small quantities that you actually need.

3. Serve two types of tea and also have the other cold beverages.  It will keep you from having to constantly go to the stove to heat water in your tea kettle.  Plus, if the room gets too warm for some people, they will have something cooler to drink.
4. Use what you have for decor and servingware.  If you find gaps, hit up Home Goods, TJ Maxx, Marshall's, Target, Target or World Market.  They have the best prices and the most diversified selections.  I actually had to pick up another tea pot and I found the polka dot one at Home Goods for $12.99 (the elephant tea pot was a Christmas present from One Kings Lane).  Make sure to check your closets for unused wedding gifts...I'm a firm believer that tea parties are a great reason to break out the crystal and fine china!  With that same idea, make sure you use cloth napkins and tablecloths.  Tea parties just aren't the same with a folded up Bounty paper towel....even if it does have the spring designs on it!  I would also try to keep your party looking a bit more modern.  Although I used doilies as placemats, there was nothing else overly flowery or grandma-like about the party.  Use unconventional colors or designs like I did with the peach and blue combo, polka dot china, and chevron straws.  If you want a pretty pretty princess pink party (which I would have been more open to if I didn't have red dining room chairs), use hot pink and mix in green and black with stripes or herringbone.  This will keep your party from looking like a 5 year old's.

5. Post-party I recommend running the dishwasher with just your champagne glasses, crystal, and other china (if dishwasher safe of course) on a light wash setting and well spaced out so you don't have to worry about them cracking against a heavy, but also so you don't have to sit there and scrub out glassware post-party.  The blue glasses, champagne glasses, and Kate Spade china is all dishwasher safe, but I didn't run it with any of my other daily dishes or the heavier serving pieces.

6. Invite husbands and boyfriends over to play food clean-up so you aren't sitting around with piles of sandwiches and cookies.  Although they may be teeny tiny, there are a lot of calories in each bite!  Mr. 3 and two other husbands came over after the tea party and put a dent in the leftover food.

7. For anything the husbands don't scarf up, provide boxes for everyone to pack up leftovers.  You don't have to decorate them like I did, just buy the cheap ziplock plastic ones from Target or Walmart.  My motto: no calories left behind!

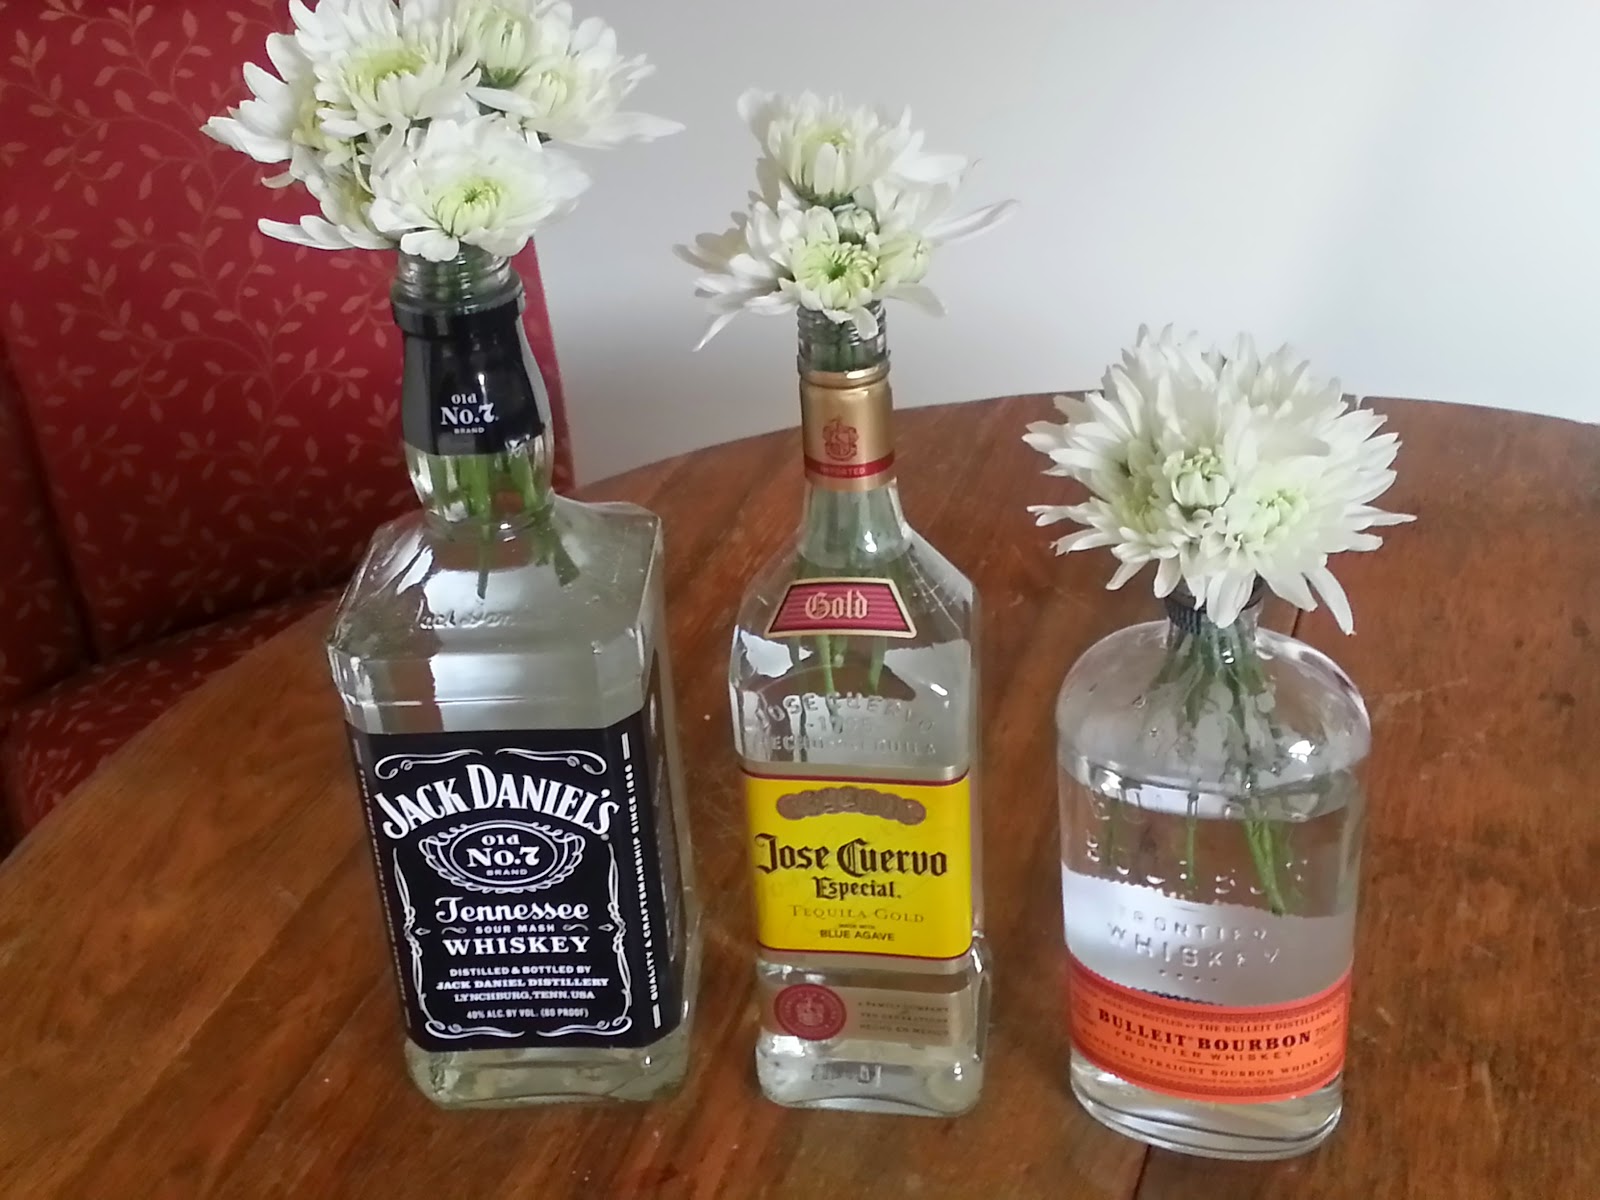
8. Put fresh flowers out.  This is a must.  It takes your tea party to a much more special level!  If you can't afford to make an arrangement, buy a few small potted plants like an African violet or buy a bunch of baby's breath and make a super fluffy arrangement.

Anyone else a big fan of tea parties?  We hope the Posh Purpose How to Host series helps you throw your own tea party in the future!