Showing posts with label Homekeeping. Show all posts

Wednesday, July 30, 2014

Sur la Table Cooking Class

Last week, I got an email from Sur la Table promoting its sale on cooking classes.  Mr. 3 and I have been dying to take a cooking class and even discussed finding one for our anniversary.  However, we haven't been able to find any that we felt we could afford (D.C. classes start at $70 per person for a really simple class).  I popped on over to the website and looked up the schedules for the classes near me.  I couldn't believe the prices!  $33.96 per person for a 2 hour cooking class!??!?  Not only was that cheaper than any other class I had seen in D.C, BUT it was a steal of a deal for a Sur la Table class that is usually priced at $69.  So, we skipped our usual date night at a restaurant to spend the money on this cooking class which was conveniently scheduled during dinnertime on Sunday night.

This was a first time cooking class for both of us, so we didn't know what to expect.  LUCKILY, Sur la Table makes the class both easy and informative.  We went to the Date Night: Night of Romance class at the Pentagon City location.  The menu included Spinach and Pancetta Salad with Dried Cherry and Port Dressing, Spice-Crusted Sea Scallops with Blood Orange Beurre Blanc, Smashed Roasted Garlic Fingerling Potatoes, and Vanilla Pots De Crème with Chocolate and Almonds.  Mr. 3 and I have had issues getting our scallops just right in the past so we were up for attending this class!

The kitchen set up at Sur la Table is amazing, but not quite what I expected.  Instead of each couple preparing each recipe, the cooking class is split into two groups which work as a team to create the dish.  For example, I chopped garlic while another couple sliced shallots.  Sur la Table does most of the prep work for you (i.e. measuring out the ingredients and washing all the produce)...they also do 100% of the cleaning!  


What we didn't like about our cooking class:
1. Mr. 3 wasn't a super big fan of the Buerre Blanc sauce (but that could have been because our group didn't get the temperature right when cooking the sauce orrrr the fact that a regular naval orange was substituted in because blood oranges are out of season).

2. We didn't make the dessert.  Post-sampling of the scallops and smashed potatoes, I turned around to make myself a decaf latte to go with the dessert I thought we were making.  By the time I got done, the chef had already read through the recipe for the dessert and served up a sample for us to try.  I was very disappointed because this is one of the items on the menu I have absolutely no knowledge of how to make and I was really looking forward to seeing how it was done.  I feel like this was a big let down for a cooking class!

What we liked about our cooking class: 
1. We were offered a choice of filtered water, a fruity drink using carbonated water from a Soda Stream, a latte or espresso from a Nespresso machine, or a coffee from the new Nespresso VertuoLine.

2. The chef was very helpful in explaining the process, offering tips, and taking over when things got a bit hairy in the kitchen.  We also received a packet with all the recipes to take home with us and recreate (for when you need an extra fancy pants dinner!).

3. We received a 10% off coupon for Sur la Table...which we used to pick up a few Christmas gifts!

4. We finally learned how to properly cook scallops! Check back this afternoon for the tips we picked up!

5. The end product!  We each tried a side salad, four scallops, a scoop of mashed potatoes, and a little pot de crème.  Mr. 3 was still a bit hungry afterwards, but it was plenty for me!

Overall Assessment:
I think the Sur la Table cooking class was tons of fun and worth going to, but if I had any suggestion it would be to make sure that you like ALL of the menu being served.  I had the option of another course that had a great dessert and meat, but it involved fennel which I cannot stand.  Now knowing that you may not even get to make the dessert, I would have been really upset to find out I paid to practice making an item I wouldn't want to ever eat.  Otherwise, I really enjoyed the set up of the kitchen and that we got to try several products like the Soda Stream.  If you decide to book a class, be sure to check out Ebates or Top Cash Back as you can get the classes even cheaper when you take into account the cash back that those companies offer.  I think our classes wound up being closer to $30 with Top Cash Back rebates.  Also, sign up for Sur la Table to get alerts on when they have a sale on cooking classes!

***This post was not sponsored by Sur la Table.  I simply had a great experience and wanted to share with others!***

Wednesday, July 9, 2014

What to do When Your Wet Swiffer Pads Dry Out

J's parents came to visit for a day last week, so of course I spent the weekend leading up to their visit cleaning. Regardless of what my apartment looks like, I always do a deep clean before company arrives. This time, the apartment was in a bad state. Between being busy with work, spending a weekend at the beach, and not having space for my birthday gifts, things were out of control. Fortunately, J is quite fond of putting stuff away so I was able to focus on the actual cleaning bit. Unfortunately, my wet swiffer pads dried out!

Of course I waited until late Sunday night to start mopping the floor (the inlaws were arriving that very next day). But instead of running to Walmart, a place I despise like no other, I decided to get a bit creative. I have a spray bottle with white vinegar and water - about a 50/50 mixture - that I use in the kitchen. Why not use it on the floor?

I worked on about 6 tiles at a time, spraying them with the mixture, letting it sit for a moment, and then swiffering away. The dried out swiffer pad worked very well to clean up the floor after I added a bit of moisture, and I had the added benefit of vinegar. While this solution was not as quick and convenient as wet swiffering with an actual wet pad, it definitely got my floors clean. I actually think the floors are cleaner than they usually are. Perhaps the wet swiffering adds a film to the tile that the vinegar removed? Not sure, but at least now I don't have to toss my dried out swiffer materials!

Do y'all have any clever, last minute, cleaning techniques formed out of desperation? Or am I the only procrastinator here?

Thursday, May 29, 2014

Posh Purpose Store Review: Stifel & Capra

 One of my favorite activities this past weekend was doing a little shopping in Falls Church, VA at a thrift store/antique/artisty gift shop called Stifel and Capra.  The store was packed with all sorts of great things to look at and pass an afternoon shopping.  The prices weren't exactly bargain basement, but they weren't as pricey as other antique stores and everything seemed to be in really good condition.  Here are a few of the most fun items that I spotted around the store:
Awesome retro stove and sweet child's rocking chair (wouldn't that be great with a cute pillow or repainted in a fun color?)

Love this cool patio furniture set....priced at $150 for all three pieces, it just needs some bright cushions to set it off!

Retro TV stands - $30 for 4.  These would make cute stands for party stations at an outdoor party - paper plates and napkins, beverages, bugspray/sunscreen, etc.  Also great for a little girl's sleepover!  Movie snacks and a nail painting station.

Adorable fruit coasters - $5 for the set.  I would love these in a beach house!

After a good cleaning - great for a playroom or little boy's bedroom.

Interesting light fixture - painted black or bright green this would be great in a powder room!  I believe it was about $90.

Wonderful selection of vintage hats!  I haven't seen this many ever...

Wonderful assortment of vintage clothing and jewelry.  One of the best features of the store were the jewelry cases.  They are old school and each level rotates with the flip of a switch!  Jewelry selection was awesome and priced between $5-$25.  I'm also loving the side table!  It was part of a set which included one other identical side table and a coffee table for $280.

I was also surprised to see a collection of vintage linens.  Usually, you are find linens with age spots or old food stains, but I found a large amount of great retro linens.  I consulted Briana and she said as wonderful as her Habitat ReStore is, there are usually none to be found.  Stifel & Capra's prices were a bit all over the place and I couldn't really say why some items were priced the way they were (maybe because they are a vendor based store), but I was impressed with the quality!  I didn't take advantage of it, but there was a collection of mix and match vintage hankies priced at 5 for $24 which I thought with a bit of starch could make a great set of cocktail napkins!  Here are my purchases for the day:

$22 for 6 napkins

50s Screen Printed Table Square  - $35
Hand embroidered tablecloth - $16

I couldn't photograph everything, but there is sooo much more to see at Stifel & Capra including original artwork and handmade jewelry.  The two ladies working that day were so helpful and kind.  Chatty when they needed to be and quiet when they didn't.  The store also has a generous 10 day return policy which is unheard of in thrift store/antiquing world.  Finally, for all you locals out there...the shop has a parking lot in front, so no worries on trying to find street parking or paying to park!  If you haven't checked it out yet, I hope you swing by!


Hours: Monday - Saturday: 10-6 and Sunday: 1-5

260 West Broad St.
Falls Church, VA 22046
(703) 533-3557

Tuesday, May 27, 2014

Posh Purpose: Styling Your Patio Garden

I hope everyone had a great Memorial Day with friends and family!  Mr. 3 and I had the most relaxing and productive weekend that we have had in quite some time.  We mixed in a little bit of housework (cleaning off our patio, hanging artwork in the living room and guest bedroom, and lots of laundry) with a bunch of fun (going to the movies, taking a bicycle ride (which is more terrifying than fun for me), grabbing ice cream in Old Town Alexandria, and antiquing for me).  One of our weekend treats was going to Home Depot to pick out plants for our patio garden.  I had originally thought that I would pick up a few terracotta pots and paint them to match my green, pink, gold, and black color scheme going on out on the patio...buuuuuut then I found these cute ceramic pots at Michael's which saved me the trouble of getting them painted:


The pink pots were originally $4.99 and the white pot was $9.99, but Michael's was running a 50% off sale and I had a 10% off total purchase coupon.  Which brought the pink pots to $2.25 and the white pot to $4.50.  The pink pots had a hole for drainage and the saucers were attached to the pots.  The white pot also had a hole for drainage, but didn't come with a saucer (I had an extra one already).  Overall, I thought these were a great deal!

I decided to plant banana peppers, jalapenos, basil, and mint with the hopes of spicy salsa, caprese salad, and mojitos for the summer!  Planting the peppers and herbs was super easy.  I chose to buy the seedlings rather than the seed packets since I figured there was less chance for planting error, overwatering, and neglect if I picked out something that had already gotten a good start.  I also didn't feel like waiting 4-6 weeks for my crops to come in.  The plants cost between $3.33-$3.68 each and I picked up a really small bag of organic potting for about $5. Since my garden is very, very small, I just used a solo cup to scoop out the dirt rather than buying trowels or gloves.


Aren't they cheerful?  I love the bright pop of color that they bring to the patio and I'm going to save a good bit of money on pricey basil and mint even if I only get a few "harvests" out of them.  Pre-packaged basil and mint usually cost between $3-4 at the grocery store.  Even if I only get to use them twice this summer I will pretty much break even on the cost of the plant and pot.


Here's a few tips for styling your patio garden:

1. Check out craft stores for prettier and cheaper pots than you can find at Home Depot.  There were no pink pots to be had at Home Depot and the cheapest fancy ceramic pot I saw was $7.

2. Take your color scheme into consideration.  I love that the bits of green plants play off the pink and white outdoor rug and my outdoor entertaining servingware.  Try to find pots that bring a pop of color to your patio...it may help remind you to water them and also use the plants you've so carefully planted.

3. Buy plants that you think will last on your patio.  I have indirect sunlight pretty much all day long with a few hours of direct sun as well, which will be great for all my plants.  I decided not to buy bell pepper or squash because we have a big tree that a squirrel could very easily crawl up and jump onto our patio to grab a tasty snack.  I think it will stay away from my hot peppers...at least after the first time.

4. Go with multiple small sized pots if you don't have much space or if your available space is awkward.  If you have enough space and don't want so many containers, buy one or two large sized pots and plant multiple items in them like herbs in one and peppers in another.

Anyone else tried to make an apartment garden?  Send us pictures!

Monday, April 14, 2014

Posh Purpose Review: Shark SC650 Deluxe Portable Steam Mop

I'm about to share with you something I never thought I would post on the Internet.  Something that people would never dream of me sharing.  Something that I'm ashamed of....my bathroom grout. (cue slasher horror movie music)


Eeeeeks!  My apartment bathrooms are white tiled with white grout...something I've grown to despise.  No matter how much I Swiffer, Tilex, Magic Eraser, or Scrubbin' Bubbles the floors, the grout has taken on a grayish tinge that won't go away and looks horrible - even if I know the floor is technically clean because I've used so many chemicals.  (While Briana and I believe in eating organic when we can afford it and using natural ingredients like baking soda, lemon, and vinegar to clean in the kitchen...we take no mercy in the bathrooms and aren't afraid of using harsh chemicals to fight the war against poopy germs as I like to call them.)  I've tried scrubbing the floor with a toothbrush and also a stiff bristled floor cleaning brush and nothing has worked.

The graying of the grout seems to be common in these apartment bathrooms.  Briana likes to remind me of the time she scrubbed my bathroom floor in my old apartment when she lived with me one summer.  She says it took a looooooooooooong time and I believed she had to walk uphill both ways in the snow to get to the bathroom as well.  However, I was really appreciative of her efforts and the bathroom looked much better for about 3 months.  

My aunt (also Briana's mom) told me about a Shark steam cleaner she used to clean the grout at their vacation home and said she had a lot of success with it, so I headed over to Bed Bath and Beyond with a 20% off coupon to buy the same brand (although, I'm not sure the same exact model).


Shark SC650 Deluxe Portable Steam Mop
$79.99
Image Source: Bed Bath and Beyond

The Shark SC650 Deluxe Portable Steam Mop comes with a ton of attachments for all sorts of cleaning.  Steam kills germs so this makes it not only a cleaning tool but one that sanitizes as well.  I was most interested in the attachments that project the steam into crevices - which there was one with and one without a scrubby brush attached to it.

I steamed the tile in the bathrooms on two different Saturdays to make sure I wouldn't kill someone I would have enough time.  The picture above is of our master bathroom floor prior to any cleaning whatsoever (I probably should have put a warning label to finish any snacks before reading this article...oopsies).  I started off by dry Swiffering the floor to pick up any dust and hair (I shed like a golden retriever).  Then I heated up the steamer (using distilled water) and used the crevice tool (no brush) to start steaming the grout a few tiles at a time.  My aunt had warned me not to try to steam big sections and then clean up the water and dirt, because it would settle back into the grout if too much time passed.  So, I followed behind the tiles, mopping up excess water and dirt with a microfiber towel/shammy (I bought them a few years ago from Target in the automotive section) and also making sure to push the towel into the grout to push out the dirt.  I worked from the tub back to the door, doing no more than three tiles at a time.  I cleaned one bathroom and most of the second one this way before trying the crevice tool with brush.  I could have saved myself a lot of time if I had started with that brush.  The rest of the tile cleaning went much quicker and had the same results, but I still had to use the shammy to push out the dirt.  I should note that about halfway through I had a sudden thought that maybe it was the towel and not the steam cleaner and I tried a few tiles with just the towel.  It did get the dirt up, but not entirely and I had to use a lot more force.  The steam must help loosen up the gunk enough to be scrubbed out.  Here's a picture showing the results.  Notice the top tiles are much whiter than the bottom tiles.


It took me about an hour and a half to do one bathroom and my bathrooms are small.  Overall, the floor looked like this when I was done:


The steamer was easy to use, heated up quickly, and came with a long cord to stretch it across the bathroom.  I only had to refill the water tank once.  I think I will only partially fill the tank next time so the steamer isn't as heavy and just refill more often.

After using the steamer, I also figured out which tiles were actually stained or had old discolored grout and just couldn't be cleaned.  Those would to be regrouted or re-colored.  Neither of which I plan to partake in since this is a rental.

I'm really happy with the results, but I'd prefer not to spend my Saturdays losing my sanity cleaning my bathroom floors.  However, now that my floors are nice and white (just in time for my Easter potluck for next weekend) I don't think I will have to steam clean them again for another 3 months. I'm considering purchasing another Shark surface steam mop to do the routine weekly cleaning so that I could extend that to maybe 6 months (this is just a theory I have...not sure if will really work).  Shark makes one that cleans hard surfaces and carpet which would probably come in handy for the white carpet wonderland I live in now.

All in all, I recommend the Shark portable steamer.  Although cleaning the floors wasn't scrub-free, I actually saw results for my efforts in comparison to all the other tactics I have tried.  I also had many thoughts about future home ownership and my time with the tile has solidified my decision to only use grey grout in any future bathrooms that I actually own as opposed to rent...or just ditch the tile altogether and go for hardwood or bamboo.  Has anyone else had any luck with their grout?  Share below in the comments section!

Friday, February 28, 2014

Kitchen Organization in the Tiny Apartment

After I was married and moved out to Las Vegas, I came to the realization that I had no clue how to unpack and organize my kitchen. I called my mother immediately. She gave me wonderful advice that I applied to two different kitchens in less than six months (yay moving). The general idea is to place your kitchen items in cabinets near the area you will use them. Before we get into the organization details, let me share with you what all I have packed into my 147 square foot kitchen.


In my mind, the kitchen revolves around the oven and stove so that is where I start when organizing a kitchen. I usually put the pots and pans to the right since I am right handed, but any lower cabinet near your oven will work. I like to put the glassware either by the fridge or by the drying area; it was more convenient in this kitchen to put them above the drying area. That cabinet was also perfect for my bowls and coffee cups. I save the tall cabinets for J's things since I can't reach that high without standing on a chair.

I don't like to waste floor space with a trash can, so we store ours under the sink along with cleaning supplies. I have my nespresso machine out for easy morning access and the pods are stored in the shallow drawer right there. The large cabinet under the drawer is on the outer edge of the kitchen but near prep space and an outlet, so that is where I store my appliances. J and I can just reach into the cabinet and put the appliance directly where we will be using it without taking any steps.


You can see in the picture above that I have stored my flatware in the drawer under the drying area. This allows for convenient "putting up" (J makes fun of that phrase every time I say it). The flatware and glassware are also right next to my casual dishes. Mom says to store your dishes near where you are plating your meal, which means right next to the stove in this tiny kitchen. I have the casual dishes on the right near the drying area since we use those most often, and the formal dishes to the left. The cabinet above the stove is perfect for keeping my empty glass jars since it is a bit high for me to easily access every day.

I am lucky to have two skinny cabinets on either side of my oven. On side is for cutting boards, near my prep space, and the other is for cookie sheets and pizza stones. I keep my cast irons inside the oven.


My main prep area is to the left of the stove. I find it convenient to have my measuring cups, trivets, food storage, and baking stuff all on that side. I keep my kitchen aid out because it is too heavy for me to lift it from a lower cabinet. When I want to bake, I just pull it forward while in use and my baking stuff is right underneath where I need to work. This side of the kitchen has more storage space, so it catches all the random pieces (hence disaster zone).

Having colanders and mixing bowls either near your fridge or prep space makes it easier to get your cooking done quickly. After the meal, the prep space turns into the cleaning up space so I also keep my food storage on that side. And of course, oven mitts near the oven makes perfect sense.


 Here are some closeups of my counter space. I don't like carrying big bags of flour and sugar out of the pantry whenever I want to cook or bake, so I have three canisters (thanks, Melinda!) to keep those two items and rice near my prep space and stove. The knife block stays out, as does the bread basket and produce bowl. I haven't found a home for my dutch oven, mostly because it is so pretty I love to look at it. I will probably put it into the oven if I ever need more prep space, but so far it's placement hasn't gotten in my way.


I keep everything I need for stovetop cooking to the right of the oven (this is a good thing for right handed people). I keep my vinegars, cooking red wine, and olive oil in old wine bottles with pourers. These bottles are better sized for my hands than the containers these things come in. I have canisters for my wooden spoons and other cooking utensils. I also use my jelly container for garlic. It bothers J that the word doesn't match the contents, but I don't mind it. If I need more space, I can put up the second drying mat but usually I don't need to do that.


I do have a small pantry (not pictured) on the other side of the fridge, which allows all my cabinets to be used for kitchen stuff. The space may be small but I have found a way to make it work for my kitchen habits and belongings. I shifted things around slightly after the preliminary unpacking and organizing as I discovered my most common uses of the counters, and you should too. It really doesn't take that much time to totally swap two giant cabinets full of pots/pans/baking stuff. Trust me, I have done it. If you have an kitchen organization tips, share with us!

Thursday, February 27, 2014

Cleaning Products: Chemicals Vs Vinegar, Baking Soda

It seems everywhere you turn on the internet, someone is advocating natural cleaning supplies, from those hippie blogs to Martha Stewart. Two of the main suggestions is to use vinegar or baking soda. Here are my thoughts after months of testing:


White Vinegar

I'm all for the power of white vinegar. It is great for cleaning the fridge and kitchen counters (food safe) and it makes a great fabric softener in the laundry. It even helps keep my white bed linens white. I have even simmered it to deodorize my apartment after a hidden orange went bad. White vinegar is awesome in so many ways.

However, it is not awesome for cleaning white bathrooms. I have tried scrubbing the shower tiles, grout, and caulk with a mixture of vinegar and water, and then just vinegar. The vinegar worked fine on the tile; the soap scum came off easily. The grout was ok, but it never achieved that sparkling clean look Martha says you need. The caulk, however, was terrible. I could never get the mildew spots to go away by using vinegar.


Baking Soda

Baking soda really works for me when there is a really grimy spot. I put a little bit of baking soda on my scrubbing toothbrush and attack. The baking soda is great for adding a bit more power to your scrub. I found it to be a particularly effective method for cleaning around the sink faucet where things build up.

Baking soda did not improve the mildew spots on the tub caulking. I scrubbed and scrubbed and scrubbed, and finally gave up. Perhaps this is a Florida issue; these less harsh cleaning methods may work in less humid climates where Martha lives. I succumbed to the chemical cleaning products


Conclusion

Buy tilex and possibly scrubbing bubbles. You can use the natural solutions like vinegar and baking soda in your kitchen where the grime is less serious, but you will want the chemicals when it comes to the bathroom or any other high humidity space. After spraying my tub and shower down with tilex just once, the mildew spots disappeared. I didn't have to scrub. All I did was spray and walk away, which amusing myself with rhymes apparently.

The caulk is now back to white, as is the grout, thanks to the easy to apply tilex. Scrubbing bubbles makes cleaning the tub much faster than vinegar or baking soda. Since I despise cleaning AND mildew, I will be sticking with my bathroom chemicals.

no mildew! thanks, tilex! go back to the kitchen, vinegar and baking soda!


Do any of y'all use less harsh methods of cleaning? Let us know what works for you! And no, I won't be sharing a picture of my mildew spots; while this is real life here at Posh Purpose, there are certain limits to what we deem appropriate photographic evidence.


Monday, February 10, 2014

Laundry Bags

I used to use laundry bags in college so I could throw my handwash only shirts into the washing machine. I know, who takes handwash only clothes to college? I never had any issue with the strategy, though. If you have a laundry sink, handwashing is definitely the safest way to go but the laundry bags are a great alternative.

I had three bathrooms in my Las Vegas apartment so I designated one sink to handwashing laundry. My current apartment is teeny and only has one bathroom, which means back to the laundry bags I went. I bought this Real Simple set at Bed Bath and Beyond with store credit (yes, I still have some left from my wedding).


I really liked the rounded zipper pull and how the bags were double lined. Both seemed like they would protect my clothes really well. An added feature was that there is a set of snaps to hold the zippers closed while in the wash. My previous wash bags didn't have this feature.

I used my wash bags yesterday. I put my silk nightgown in one (previously handwashed) and a cotton top along with a pair of J's dress socks. Random, but efficient. However, the nightgown bag opened during the wash cycle and my nightgown fell out! I have never had this happen to me in all my years of wash bags, so it is surprising that it happened to the one bag with snaps to hold the zipper closed. Apparently those snaps are not enough? The other bag stayed closed so maybe it was a fluke. The snaps did not come undone, so next time I will just loop the snap fabric around itself to make the whole thing tighter and more secure. Hopefully that will work.

Moral of the story: wash bags are great for handwashing items when you don't have a beautiful laundry set up like we see on Pinterest. But they apparently can open up on you, so take extra precautions to protect your favorite delicates.

P.S. the nightgown was not damaged and we aren't making any money off this post in any way. I just wanted to share my wash bag experience.

Tuesday, January 14, 2014

Product Review: Cascade ActionPacs

I usually wind up getting overwhelmed by products in the cleaning aisle.  Unlike beauty products where I know some things to look for (i.e. packaging that keeps the sun and air out), cleaning products are a little bit different.  I'm not a chemist so the ingredients mean nothing to me and I don't know what might make one cleaner better than another.  I usually err on the side of getting a name brand that is on sale and if there are multiple products available in the line, I go for the mid-range one.  I've been practicing this method for the past 8 years and it seems to work out ok (off-brand Magic Erasers are just not as good as the ones my friend Mr. Clean makes!).

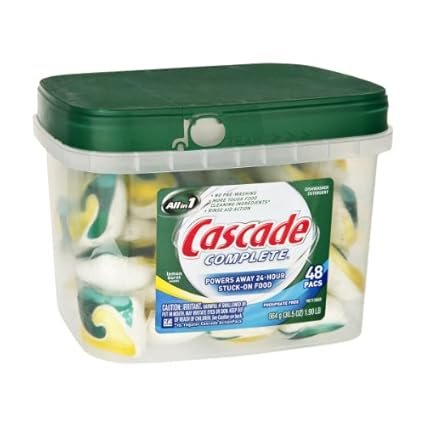
Once we moved into our new apartment back in September and I got a dishwasher back in my life (Hallelujah!), I started using Cascade Actionpacs in my dishwasher.  Since it had been 5 years since having a dishwasher, I was behind in the times and didn't even really know about Actionpacs.  Growing up, I remembered my mother using Cascade so that was another reason I veered toward the brand.  I started using the Cascade Complete which isn't the bottom rung option, but also isn't the Rolls Royce Platinum version either.
Cascade Complete
$15.99 for 48 ct.
Image Source: Amazon

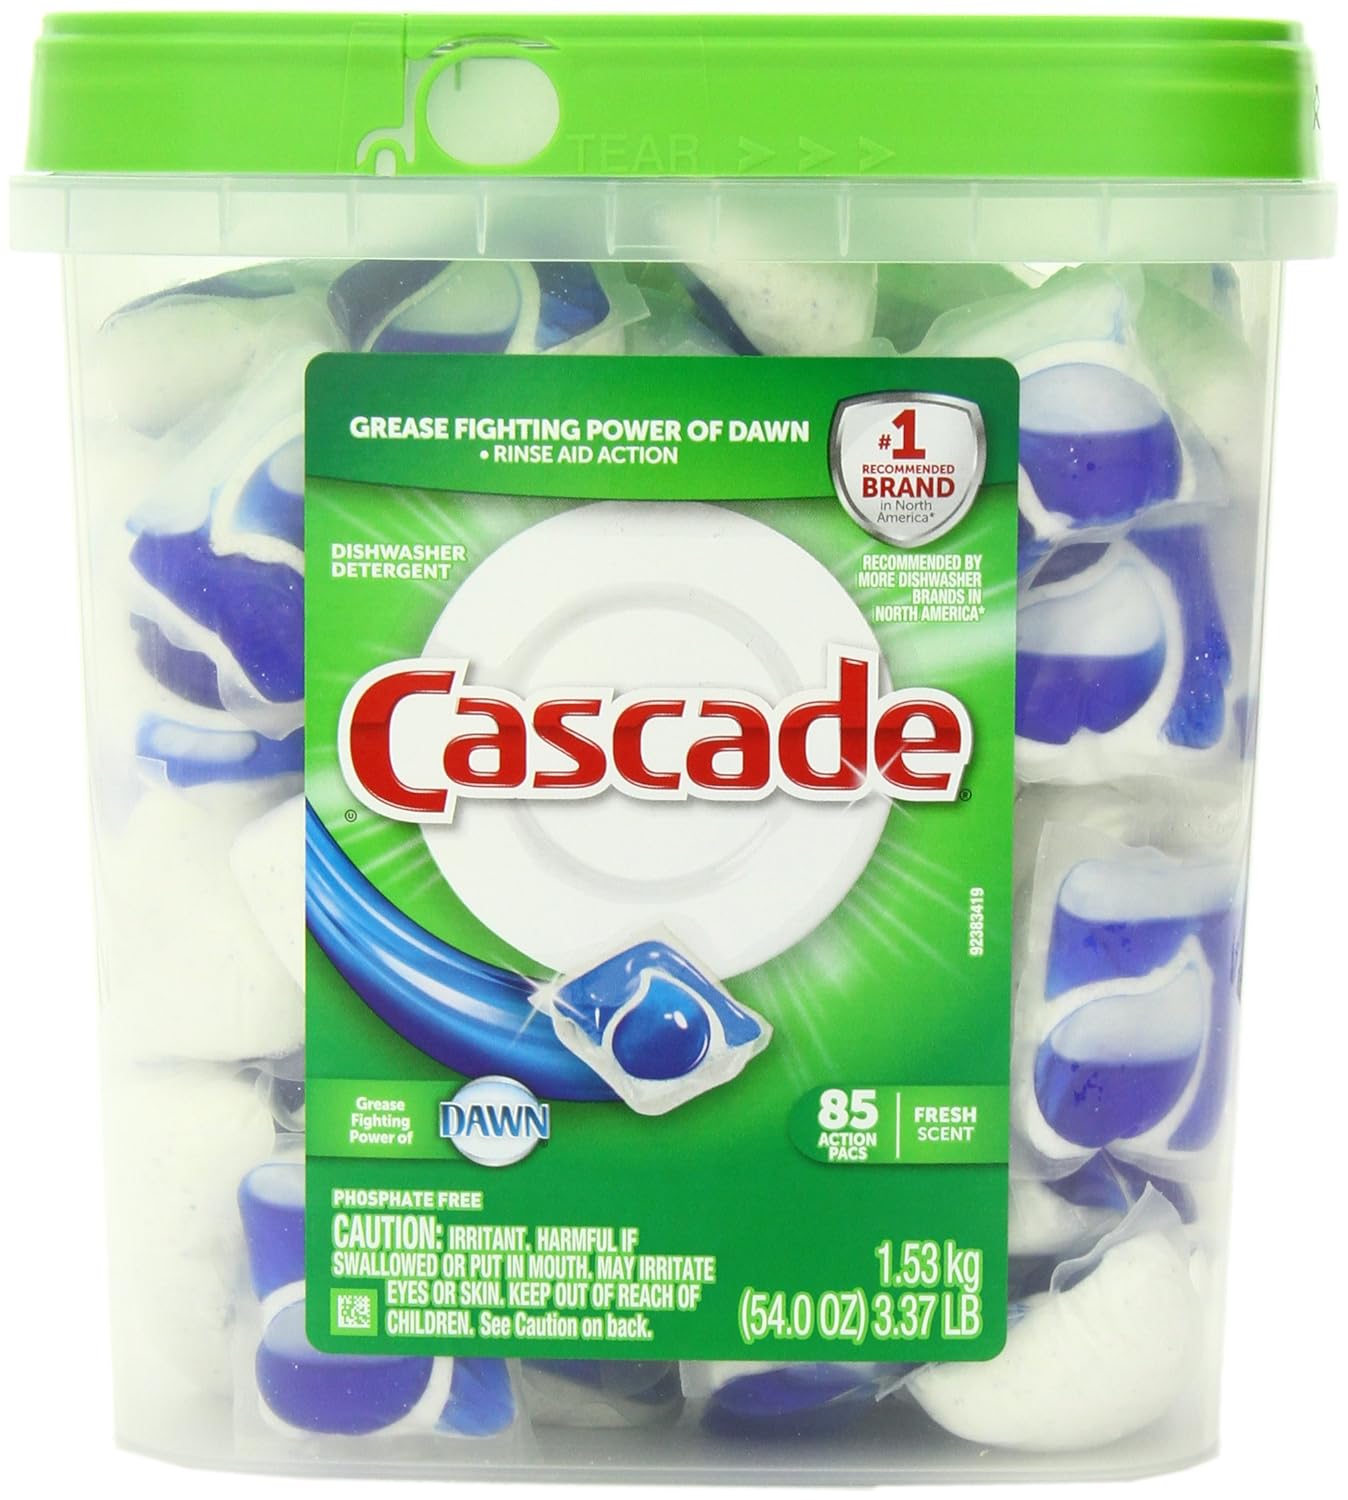
I liked the results overall, but on a recent trip to the grocery store, the regular old Cascade bottom rung Actionpacs were on a far better sale, so I decided to give them a whirl.

Cascade Actionpacs
$15.46 for 85 ct.
Image Source: Amazon
Much to my surprise, the cheaper version worked way better than the more expensive kind.  They did a better job of cleaning the dishes and with fewer water spots on the glasses and silverware.  I'm a big fan and super excited to save money on my grocery budget!

The Verdict: Sold and saving!

Anyone else come across cheaper cleaning products with better effects?  Let us know below!

Friday, January 10, 2014

DIY Makeup Brush Holder

I've set up a makeup desk out of a tea cart (which I will be styling and sharing with y'all next week!) in our master bedroom with all of my makeup, perfume, and my everyday jewelry.  I've been keeping my makeup brushes in a small cosmetic case, but I've wanted a container to hold them and make the cart look prettier. After looking at a bunch of different options (fancy water cups in the bath section of Target, Marshall's, and Home Goods), I decided to make my own makeup brush holder using an item I already had: a used candle.

Mr. 3's mother-in-law gave me a nice Tocca candle which I really enjoyed burning (it has a cucumber grapefruit fragrance that is wonderful) and the candle was in a pretty, opaque white glass container that I knew could be reused, but just needed a bit of cleaning up.  This project is super simple and easy to do with any old glass candle containers.

Tocca Cleopatra Candle
$38
Image Source: Amazon (also available here and here)

Here's what I started with:

The candle had a bit of soot around the top portion of the container that needed to be cleaned.  I first tried spraying Method kitchen cleaner on a paper towel, but that just smeared it around mostly and didn't really get a whole lot of the soot off.  So I then grabbed a Scrubbing Bubbles wipe that I usually use for bathroom cleaning and it came off much easier.   Here's how it looked after:


The remaining black residue is stuck to melted wax and would need to be scrapped off.  Since I was just putting makeup brushes in it anyways and the container it likely to get a good coating of makeup dust anyways, I didn't bother trying to remove it.  I then popped the candle in the freezer (setting a timer for 30 minutes so I wouldn't forget about it) to remove the wax and little bit of wick remaining in the bottom.


After 30 minutes had past, I took the container out and ran a knife around the edge to loosen the wax and it popped out cleanly.  Here's how it looked after I put my makeup brushes in:


Pretty cute, right?  Best part about this project is that it was (1) free! and (2) fast.  It's nice to sit down to put on makeup with such a pretty container and the candle still lingers a bit so I'm still getting to enjoy the fragrance.

Anyone else have any fun uses for candle containers?  I think they are a great way to keep something from going to the landfill and prettying up a space!

Friday, January 3, 2014

Briana's 2014 Goals

Melinda shared her goals for 2014 this morning, and now it's my turn. She kindly came up with a theme (and all the categories!) that was not the stereotypical New Year's resolutions. Those sorts of statements don't work for me, but discussing short and long term goals is wonderful and should be done through out the year. We will definitely be keeping y'all updated on the relevant goals. And if you want to read another perspective, my sister-in-law wrote a wonderful piece on why she is also not a fan of New Year's resolutions.

Beauty: I am pretty satisfied with my makeup routine. I switch it up enough to not get bored, but I also have a set of basic steps that I can do to look presentable quickly. However, I never ever do my hair just for the fun of it. If my hair is dirty and I don't have time to wash it, I will put it up in a bun or a braid and sometimes I experiment with scarves. I would like to try out new hairstyles this year that aren't necessarily because I don't want to wash my hair that day. You can follow along with which styles interest me on my Stylin' Pinterest board.

Health: I will continue to zumba with my sister Rebekah twice a week. The other night I had a brief lapse in judgement and actually considered running. Haha no. But perhaps I should find another source of exercise? That one is still open for discussion. As for diet, we do a really good job of eating our vegetables but I want to take advantage of the winter fruit season in Florida. I will prepare and serve fruit to J and myself every day while the strawberries and grapefruit are being picked. Once citrus and strawberry season are over in Florida, I will research what other Florida fruits are fresh at that time. Summer here is really too hot for a lot of farming, so that may be tricky, but overall I want to eat more fresh produce while it is in season locally.

Finance: As you may know, J and I moved back to my hometown in Florida last May. We decided it was the perfect opportunity to start our own business. Right now we have two in the works which is very exciting, but of course owning your own businesses is not easy. I have really improved in budgeting our money since we have been mostly living out of our savings account (more on that later!). Our short term goals are to earn enough money to cover at least 75% of our living expenses for the next few months. We hope to break even by May and to restore our savings account to it's former number by this time next year. These goals are definitely attainable, but that last one will be a stretch.

Spiritual: My number one goal is to attend church more regularly. J and I go to the church I grew up in (and the church where our wedding took place) and we recently hired a new preacher. He is wonderful and enthusiastic about leading our congregation. Now I just need to wake up and get dressed! I'm shooting for three out of every four Sundays we are in town.

Creative: J's parents gave me a sewing machine for Christmas and I can't wait to use it! I took a sewing class when I was in elementary school and have played around with sewing from time to time, but I have no real training. I want to make a few skirts and actually learn real techniques rather than my traditional approach of just winging it (see DIY monogrammed gloves). I also will finish those Habitat chairs and my end table.

Intellectual: This one is similar to Melinda's. I will read more often in 2014, at least one novel a month and a handful of news stories every week. I actually already started working on this goal! After Christmas, I rediscovered iBooks on my laptop and read the first novel of Sherlock Holmes. The wonderful thing about iBooks is that most of the old pieces of literature are available for free download because their copyright has run out. If you have ever wanted to read Jane Austen's entire work, you should definitely check it out! This month I will finish the second novel of Sherlock Holmes. And my secondary reading goal is to finish all the novels I start. I have a bad habit of picking up books, enjoying them, but then taking forever to finish because I start reading other things. I need to finish Anna Karenina and Crime and Punishment. I see a theme here..

Blog: My favorite topic for the blog is Thrift Store Finds. I will be more diligent about taking pictures of cool/wacky things I spot in our many thrift stores and then actually sharing them with y'all. And since I can't help myself when it comes to buying interesting and cheap furniture, I will step it up on the DIY restoration blogging. Believe it or not, I am totally not an arts and crafts person. I don't love it like many bloggers do. However I am extremely particular. I came to the conclusion that I must get involved in crafty things so that I can have the look and style I want. Overall, Melinda and I want to continue providing interesting content about the Posh Purpose lifestyle but this year we will have better pictures (work in progress).

Melinda and I love writing this blog together and we hope y'all enjoy reading it. I am very excited to see how we improve in 2014. Now that the holiday season is over, we will be focusing on topics that are relevant to daily life, such as budgeting, housekeeping, beauty habits, and recipes. We won't forget the fun stuff, though! Melinda and I have lots of party ideas to try out and of course share with you. And I know y'all are dying to hear about my foray into sewing.


March update
February update
January update

Friday, December 20, 2013

Prepping for Christmas 2014!

Y'all don't kill me now, but a good way to get started on saving money for Christmas 2014, is to start saving today!  One of the expenses that everyone has, but most people forget to add into their Christmas budgets is the cost of decorations and gift wrap.  You can easily cut your costs for next year with a bit of careful planning over the next 2-3 weeks.

First up, decor!  I have had my eye on a few decorations, but just couldn't swing them with the cost of buying all the ornaments for our first Christmas tree.  Shop the after Christmas sales at your favorite places, where stores like Target have traditionally marked their goods down by 50% beginning the day after Christmas.  If the thought of getting out in the crowds on December 26th terrifies you, go later in the day.  Chances are there will be a decent selection and the early bird, marathon shoppers are usually tired and head home around dinner time.  However, the steepest discounts usually begin in mid-January.  Typically, I start looking at Pottery Barn and Williams-Sonoma during that time frame, because I can find things 50-75% off.  If you are looking to upgrade your current tree skirt or stockings, this is a great time to buy and save some money for next year.  I know I really want a few mercury glass trees to set out as a centerpiece for next year.

Next up, gift wrap!  Paper companies make a ton of money during the holiday season and I find it ridiculous to pay their high price tags.  That said, I absolutely love high-end gift wrap and I refuse to buy cheap paper, ribbon, and gift tags (stick on bows are different - a stick on bow is a stick on bow no matter how you price it, so go cheap on those).  Don't judge!...everyone has their own "thang"...and mine happens to be paper snobbery.  However, I should mention, that to me, high-end paper means thick and rich looking (i.e. foil, metallics, beautiful prints), but not necessarily any ol' roll that comes from an expensive store (ahem, Papyrus).  The weeks after Christmas are the best time to buy my high-end paper (although, Home Goods has lots of high quality rolls for the $4-5 mark if you should need to purchase it in season).  I also tend to gravitate towards wired or satin ribbon as I think they make the best bows.

For sources, check out Target and Walmart (they often have paper labeled as "premium" and its original price is usually 50-100% higher), but also department stores like Belk and Dillards and unconventional places like the drug store (people rarely think to look at drug stores, but they usually carry Hallmark's beautiful papers and gift wrap!).  Discount stores like TJ Maxx, Marshall's, and Home Goods are usually stripped out of holiday items in general and I rarely see them offer additional discounts or after Christmas sales.

The biggest way to save money, is not to spend it.  If you have already invested in high quality gift wrap for this season - reuse it.  My mother will often give me back my ribbon, so I'm able to fold it nicely and store it in a ziplock bag for next year.  If your paper is in good condition, re-roll it around an empty tube  (My mother has been doing this for years...I have one favorite roll that's pink with angels on it.  My mother used it when I was little for all my gifts and reused and reused, so that it became "MY present paper".  Now there is barely any left, but I still sometimes get a small present wrapped in my angel paper which is a very great family tradition.).  In my case, I also reuse the good quality gift boxes, so a  lot of this paper will already be pre-cut for next year!  Department stores usually have the best boxes, so if you just bought a cheap multi-pack, feel free to pitch those and keep the others (Nordstrom, Sephora, and Anthropolgie carry the best ones!).  The cheap ones rarely keep their shape and the glue that holds them together gets very weak, especially if you store them in your hot summer attic.  If you have nice gift bags that are still in good condition, remove the gift tag label and fold the bag nicely.  Buy tie-on gift tags so you can reuse the bags next year!  The only thing I pitch in its entirety is tissue paper.  If it's been used in a high quality shirt box and can easily be compacted down with the box, then that's probably ok.  However, if you've used it to stuff bags or it's gotten too wrinkly in the shirt box, PITCH IT.

Storage items are also on sale post-Christmas, so if you bought a new wreath, look for a wreath box to protect it!  Or get a plastic box meant for storing wrapping paper.  These things are rarely part of the promotional sales that are offered during the Christmas season, which means they are almost always full price until after Christmas, so it's a good time to stock up! You can also use one of your reused gift boxes to store any stick-on bows you buy to keep them organized and prevent them from getting squashed.

Lastly, I would highly recommend that you buy your Christmas cards for next year now.  At 50-75% off, you can definitely buy the most beautiful foiled lined envelopes, letterpressed or engraved cards to send out to your loved ones and business contacts next year.

This year, I will need to grab gift tags, gift bags, tissue paper, and Christmas cards.  I'm also interested in getting a few more pre-made decorative boxes because they are super sturdy, which came in handy when I shipped my wonderful aunties their gifts to Florida and Arizona.  If I see a beautiful roll or three of ribbon I will probably pick up those too (they came in handy for decorating my magnolia wreath!).  Don't buy more than you need or can store, but make sure to take advantage of the discounts so you can avoid paying full price next year!

Any good shops I missed to check out their markdowns post Christmas?  Let us know!

Monday, December 9, 2013

Luxe & Lovely Entertaining Gifts

Briana and I have been putting together a list of entertaining gift ideas for your favorite hostess with the mostest, girlfriend who loves a good cocktail, or person who you just don't know what to get (they probably don't have any of these!).  I love the idea of getting your hostess or friend a something a little bit glamorous, but know your audience.  If you're going to a cookie swap and the hostess' style is shabby chic, a beautiful set of high quality dish towels or copper cookie cutters might be the way to go.  Another great gift idea for your hostess if you don't know her that well or if you are a little tight on funds is to buy a beautiful poinsettia, amaryllis bloom, or paper whites.  All of these plants are available during the Christmas season.  I would buy one in bloom rather than a bulb kit (you hostess may not want one more task on her plate).  These plants should be $15 or less.  Otherwise, here are some luxe and lovely entertaining gifts for all your parties!

Gold Mirrored Table Top Tray
$29.99
Image Source: World Market


Kate Spade Jules Point Bottle Stopper
$35
Image Source: Bloomingdales

Mark & Graham's Typographer Linen Coasters
$35 for set of 6
Image Source: Mark & Graham


Small Rectangular Lacquer Tray
(monogramming available)
$44 plus $7 for monogram
Image Source: West Elm

$48 for set of 8 or $48 for set of 4
Image Source: CWonder

Kate Spade Top Hat Metal Ice Bucket
$79.99
Image Source: Bed, Bath, and Beyond

Chevron Grey Marble Server
$14.95
Image Source: CB2
Mercury Glass Bar Tools Set
$34.95
Image Source: World Market

Champagne Bottle Ornament
$45
Image Source: Tiffany

Oil & Vinegar Glass Bottles with Wooden Stoppers
Set of Two - Monogramming Available ($7 per item)
$19
Image Source: West Elm

Copper Cook's Tools
$12 each
Image Source: West Elm

Limited Edition Golden Monogram Mug
$10 each
Image Source: Anthropologie

I know I would be excited to get any of these as presents!  Make sure to check for coupons, free shipping offers (I know the two West Elm items have free shipping), and use Ebates!   Do you have a favorite?  What else are you giving?

Monday, November 18, 2013

Recently Spotted: Kate Spade Pierrepont Place Line

During one of my recent trolls on the Bloomies website (looking for all things luxe aaaaand on sale) I came across a new Kate Spade servingware line.   I'm seriously obsessing over all things with black trim and I love, love, love the look of these pieces!
Kate Spade Pierrepont Place Bowl
$125
Image Source: Bloomingdales
Kate Spade Pierrepont Place Chip and Dip
$150
Image Source: Bloomingdales

Kate Spade Pierrepont Place 2-Piece Serving Set
$60
Image Source: Bloomingdales

Kate Spade Pierrepont Place 2-Piece Bar Set
$50
Image Source: Bloomingdales

The line is nickel-plated with enamel accents...which means hand washing (evidently I shall be forever chained to the sink for my love of all things not-dishwasher safe).  Unfortunately, at this point in my life, I don't have the budget for $400 in servingware, but I love that the black enameling has become a trend in housewares! Bloomies is the only one carrying Pierrepont Place in the area I think, so I will have to check it out in person so I can sigh over it and picture it in my black and white dream house (which is one of many dream houses I have going on).  These pieces would look great in this fancy pants kitchen:

Image Source: Unknown


This fancy pants dining room:

Image Source: Ana Antunes 


Or either of these two fancy pants houses:

Image Source: Lisa Price Inc.

Image Source: Houzz


What do you think of the black and white color combo?  Check out our other dream homes by following Briana and me on Pinterest!